
Customize Dock on macOS is an essential skill that every Mac user should master to enhance their productivity and streamline their workflow. The Dock serves as a central hub for your most frequently used applications, and customizing it allows you to tailor your workspace to your unique needs. By exploring various macOS Dock customization options, you can efficiently add apps to the Dock, hide it when not in use, and organize your icons for easy access. Understanding Dock settings on macOS, such as resizing, repositioning, and adding spacers, can significantly improve your user experience. With these Dock organization tips, you’ll not only declutter your interface but also navigate your Mac with newfound efficiency.
The Dock on macOS is a pivotal feature for navigating the operating system, offering a visual interface for quick access to applications and files. Mastering the art of personalizing this tool can transform how you interact with your computer, making it more efficient and tailored to your preferences. By employing various techniques to modify the Dock layout, you can keep your most utilized programs at your fingertips while ensuring a clean workspace. Whether you choose to conceal the Dock for added screen space or rearrange your apps for better accessibility, understanding these customization strategies is key. Dive into the world of Dock management and discover how these adjustments can enhance your overall macOS experience.
Understanding Dock Customization on macOS
The Dock is an integral part of the macOS interface, serving as a launchpad for your most-used applications and files. Customizing the Dock not only enhances your workflow but also makes your digital space more organized. By tailoring the Dock to fit your needs, you can streamline your access to applications, ensuring that you have everything you need at your fingertips. Whether you’re a casual user or a power user, understanding how to navigate Dock customization on macOS is essential.
To begin your journey into Dock customization, familiarize yourself with essential Dock settings macOS provides. This includes adding and removing items, changing the size of the Dock, and even altering its position on the screen. Each of these settings plays a vital role in how you interact with your Mac, allowing you to create a personalized experience that fits your workflow. The more you explore these customization features, the more efficient you’ll become at using your macOS.
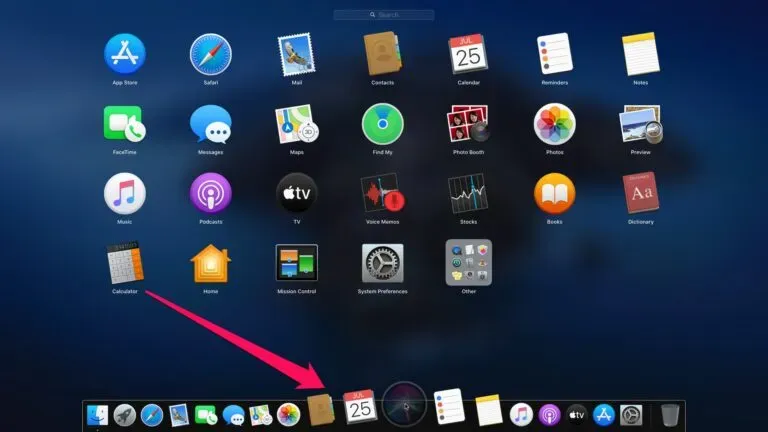
How to Add Apps to Your Dock on macOS
Adding apps to your Dock on macOS is a straightforward process that can significantly enhance your productivity. Simply find the application in the Launchpad or Finder, then drag it into the Dock for quick access. This method not only saves time but also keeps your most-used applications within easy reach. Moreover, you can also add folders and files to the Dock, which makes organizing your workspace easier than ever.
It’s important to remember that the Dock can become cluttered if too many icons are added. Therefore, it’s wise to only include the applications you use frequently. By managing what is in your Dock, you can maintain a clean and efficient workspace on macOS. This practice of selective addition will also help in optimizing your Dock for better organization and access.
Hiding the Dock for a Cleaner Workspace
One effective way to enhance your macOS experience is by hiding the Dock. This feature allows you to reclaim valuable screen space, especially when working on documents or projects that require full concentration. By setting the Dock to hide, it only appears when you move your mouse to the edge of the screen, ensuring your focus remains on your current task. This is particularly useful for creative professionals who need an uncluttered workspace.
To activate the hiding feature, simply right-click on the Dock divider and select ‘Turn Hiding On’ or navigate to System Settings. This customization not only provides a cleaner aesthetic but also encourages a more immersive workflow. By utilizing the hide feature, you can enjoy a streamlined interface while still having the Dock readily available when needed.
Organizing Your Dock with Spacers
Dock organization is crucial for maintaining a productive workspace on macOS. One effective method is to use spacers, which are empty spaces that help segment your applications into manageable groups. By adding spacers, you can create visual breaks between different categories of apps, making it easier to find what you need quickly. Using Terminal commands, you can customize the size of these spacers, allowing for a tailored organization that fits your personal style.

Implementing spacers in your Dock not only enhances visibility but also improves your overall efficiency. For instance, you could group productivity apps separately from entertainment apps, streamlining your daily tasks. This thoughtful organization technique can significantly reduce the time you spend searching for applications, making your macOS experience smoother and more enjoyable.
Changing the Size of Your Dock
Another essential aspect of Dock customization is adjusting its size. Depending on your screen space and personal preference, you may want a larger Dock for visibility or a smaller one to maximize your workspace. To change the size, simply hover over the divider in the Dock until you see a double-headed arrow, then drag it to your desired size. Additionally, enabling the ‘Turn Magnification On’ feature can further enhance accessibility, allowing you to see app icons more clearly.
A well-sized Dock contributes to a more organized macOS environment. If you frequently use many applications, a larger Dock can help you keep everything in view without overcrowding your screen. Conversely, if you prefer a minimalist aesthetic, a smaller Dock can retain the sleek look of your workspace while still providing access to your most-used apps.
Making Your Dock Appear Faster When Hidden
If you’ve decided to hide your Dock for a cleaner workspace, you can also accelerate its appearance when needed. By default, a small animation occurs when the Dock is revealed, but you can disable this to make it appear instantly. Using a simple Terminal command, you can modify the behavior of the Dock, allowing for quick access without any delay. This enhancement is particularly useful for users who frequently switch between applications.
Implementing this customization ensures that your workflow remains uninterrupted, especially during tasks that require swift transitions between applications. Removing the animation effect provides a seamless experience, letting you navigate your macOS environment with ease. Such small adjustments can make a significant difference in your overall productivity.
Adding Your Applications Folder to the Dock
For those who prefer a tidy Dock, adding the entire Applications folder can be a game changer. Instead of cluttering your Dock with numerous app icons, you can simply drag the Applications folder to the right of the Dock divider. This method provides quick access to all your applications without the need for multiple icons, making it ideal for users who want to streamline their workspace.
After placing the Applications folder in your Dock, you can further customize how it appears. Right-click on the folder icon and select ‘View Content as Grid’ for a more organized layout. This function simplifies navigation through your applications, allowing you to locate what you need faster. By keeping your Dock organized, you enhance your overall efficiency while working on your Mac.
Customizing App Icons in the Dock
Customizing your app icons in the Dock not only adds a personal touch to your macOS experience but also helps in differentiating similar applications. If you find yourself using multiple apps with similar icons, changing them can prevent confusion and enhance your productivity. The process is quite simple: locate the app in your Applications folder, right-click, and select ‘Get Info.’ From there, you can drag and drop a new icon onto the existing one.
This simple customization allows you to create a visually distinct Dock that suits your style. Besides aesthetics, it can lead to a more intuitive navigation experience as you can easily identify your apps at a glance. Experimenting with different designs can be a fun way to personalize your workspace while also improving functionality.
Adding the Activity Monitor to Your Dock
For users who need to monitor their Mac’s performance, adding the Activity Monitor to your Dock is an excellent idea. This app provides real-time insights into CPU usage, memory consumption, and network activity, allowing you to keep tabs on your system’s health. By incorporating the Activity Monitor into your Dock, you gain immediate access to critical performance metrics, helping you make informed decisions while working.


To add the Activity Monitor to your Dock, simply open the app and adjust the Dock icon settings from the View menu. You can choose to display various performance metrics, ensuring that you have the information you need at a glance. This customization not only enhances your productivity but also empowers you to maintain optimal performance on your macOS.
Replacing the Dock with uBar for Enhanced Customization
If you find that the Dock does not meet your needs, consider replacing it entirely with uBar, a customizable alternative that mimics the Windows taskbar. With uBar, you can enjoy a more flexible layout, allowing you to see previews of open windows and manage your applications more effectively. This application offers extensive features that enhance usability, especially for those who prefer a more traditional task management style.
uBar is particularly advantageous for users with multiple monitors, as it provides options to customize the location and appearance of your taskbar. While it is a paid application, the 14-day trial allows you to explore its features before committing. If you’re looking for a way to bring more organization and functionality to your macOS workspace, uBar could be the perfect solution.
Frequently Asked Questions
How can I customize the Dock on macOS to add apps?
To customize the Dock on macOS and add apps, open the Launchpad, find the app you want, and simply drag its icon into the Dock. If the app is already open, right-click its icon in the Dock, select ‘Options,’ and then choose ‘Keep in Dock.’ You can also add folders and files by dragging them to the right side of the Dock.
What are some tips for Dock organization on macOS?
For effective Dock organization on macOS, consider adding spacers to separate different groups of apps. You can create spacers using Terminal commands to maintain a tidy Dock. Additionally, keep only your most-used applications in the Dock while placing less frequently used ones in the Applications folder.
How do I hide the Dock on macOS for a cleaner workspace?
To hide the Dock on macOS, right-click the divider in the Dock and select ‘Turn Hiding On.’ Alternatively, go to System Settings > Desktop & Dock and toggle ‘Automatically hide and show the Dock.’ This will allow you to reclaim screen space and access the Dock only when necessary.
Can I change the size of the Dock on macOS?
Yes, you can customize the size of the Dock on macOS. Simply hover over the divider until you see a double-headed arrow, then drag up to increase the size or down to decrease it. You can also enable ‘Magnification’ in System Settings to make icons larger when hovered over.
What is the process to add spacers in the Dock on macOS?
To add spacers for better organization in the Dock on macOS, open the Terminal app and enter the command for a full-sized spacer: `defaults write com.apple.dock persistent-apps -array-add ‘{ “tile-type” = “spacer-tile”; }’; killall Dock` or for a half-sized spacer: `defaults write com.apple.dock persistent-apps -array-add ‘{ “tile-type” = “small-spacer-tile”; }’; killall Dock`. After executing the command, you can drag the spacers to your preferred positions.
How can I make the Dock appear faster when hidden on macOS?
To improve the speed at which the hidden Dock appears on macOS, use Terminal to disable the animation. Enter `defaults write com.apple.dock autohide-time-modifier -float 0; killall Dock`. To revert to the original setting with animation, use `defaults delete com.apple.dock autohide-time-modifier; killall Dock`.

Is it possible to add the Applications folder to the Dock on macOS?
Yes, you can add your Applications folder to the Dock on macOS. Open Finder, locate the Applications folder in the sidebar, and drag it to the right side of the Dock. Right-click the icon and select ‘View Content as Grid’ for easier access to your applications.
How do I customize app icons in the Dock on macOS?
To customize app icons in the Dock on macOS, right-click the app in your Applications folder, select ‘Get Info,’ then drag a new image file (PNG, JPEG, or ICNS) onto the icon in the top left corner of the info window. This allows you to personalize your Dock with custom designs.
Can I change the position of the Dock on macOS?
Yes, you can change the position of the Dock on macOS. Right-click the divider in the Dock, select ‘Position on Screen,’ and choose either ‘Left,’ ‘Right,’ or ‘Bottom’ to customize where you want the Dock to appear.
What options do I have for replacing the Dock on macOS?
If you’re looking for alternatives to the Dock on macOS, consider using uBar, a customizable app that mimics the Windows taskbar. It offers features like window previews, media controls, and can be positioned at the top of the screen. uBar has a 14-day trial for you to explore its capabilities.
| Feature | Description |
|---|---|
| Add and Remove Items | Easily add apps, folders, and files to the Dock by dragging them into place. Remove items by dragging them upwards until ‘Remove’ appears. |
| Hide the Dock | To save screen space, you can hide the Dock and access it by moving the mouse to the screen bottom. Enable this in System Settings or by right-clicking the Dock divider. |
| Change the Position of the Dock | Move the Dock to the left or right side for a different layout by right-clicking the divider and selecting ‘Position on Screen’. |
| Change the Size of the Dock | Resize the Dock by dragging the divider up or down. Enable ‘Turn Magnification On’ for a better visual on smaller sizes. |
| Add a Spacer or Half Spacer | Use Terminal to add spacers for organization. Full-sized and half-sized spacers can help separate apps visually. |
| Make the Dock Appear Faster When Hidden | Speed up the Dock’s appearance by removing its animation using a Terminal command. |
| Add Your Applications Folder to the Dock | Drag the Applications folder to the Dock for quick access without clutter. |
| Make App and Folder Grids Easier to Navigate | Add a hover effect to the Dock items for better navigation using Terminal. |
| Change and Customize Your App Icons | Personalize app icons by dragging new images onto the app’s icon in the Get Info window. |
| Add the Activity Monitor to the Dock | Keep track of Mac performance by adding the Activity Monitor and selecting how to display its data. |
| Replace the Dock Entirely | Consider using uBar as an alternative to the Dock for more customization options and features. |
Summary
Customize Dock on macOS is essential for enhancing your user experience. The Dock is not just a simple launcher; it can be tailored to fit your workflow, making it more efficient and visually appealing. From adding and removing items to changing its position and size, there are numerous customization options available. You can even add spacers for organization, hide the Dock for more screen space, and modify app icons for better differentiation. By mastering these customization features, you can navigate your Mac more effectively and personalize your workspace to suit your needs.

