
If you’re looking to enhance your Windows 11 privacy, removing EXIF data from your images is an essential step. EXIF data, which includes sensitive information like camera details and photo locations, can be easily stripped from photos to protect your personal information. To remove EXIF data on Windows 11, you can utilize built-in features such as File Explorer, the Photos app, or even batch remove EXIF data using PowerShell. For those who prefer third-party solutions, tools like IrfanView offer effective EXIF removal options. By taking these steps, you can ensure that your digital images maintain your privacy while sharing or storing them.
In the digital photography realm, safeguarding your personal information is increasingly important, particularly when it comes to photo metadata. The process of erasing metadata, including EXIF data, from images on Windows 11 can be approached through various methods. Whether you choose to use the native File Explorer tool, the versatile Photos app, or even advanced scripting with PowerShell, the options are plentiful for users. Additionally, applications like IrfanView allow for straightforward metadata removal, making it accessible for everyone. Understanding how to effectively manage and delete this data not only protects your privacy but also ensures a cleaner digital footprint.
Understanding EXIF Data and Its Impact on Privacy
EXIF data, or Exchangeable Image File Format, is embedded in photographs taken with digital cameras and smartphones. This data includes a wealth of information, such as the camera model, date and time the photo was taken, and even the GPS coordinates of the location where the picture was captured. While this information can be useful for organizing and cataloging photos, it poses significant privacy risks. For instance, sharing images online without removing this data could inadvertently disclose your location or other personal details to strangers.
In the era of digital photography, understanding how to manage EXIF data is crucial for maintaining your privacy. When you post a photo on social media or share it via email, the recipient may access this hidden information. This could lead to unwanted attention or privacy invasions, especially if the images reveal your home address or favorite locations. Therefore, being proactive about removing photo metadata is essential. This guide will outline various methods to remove EXIF data on Windows 11, ensuring that your privacy remains intact.
Remove EXIF Data on Windows 11 Using File Explorer
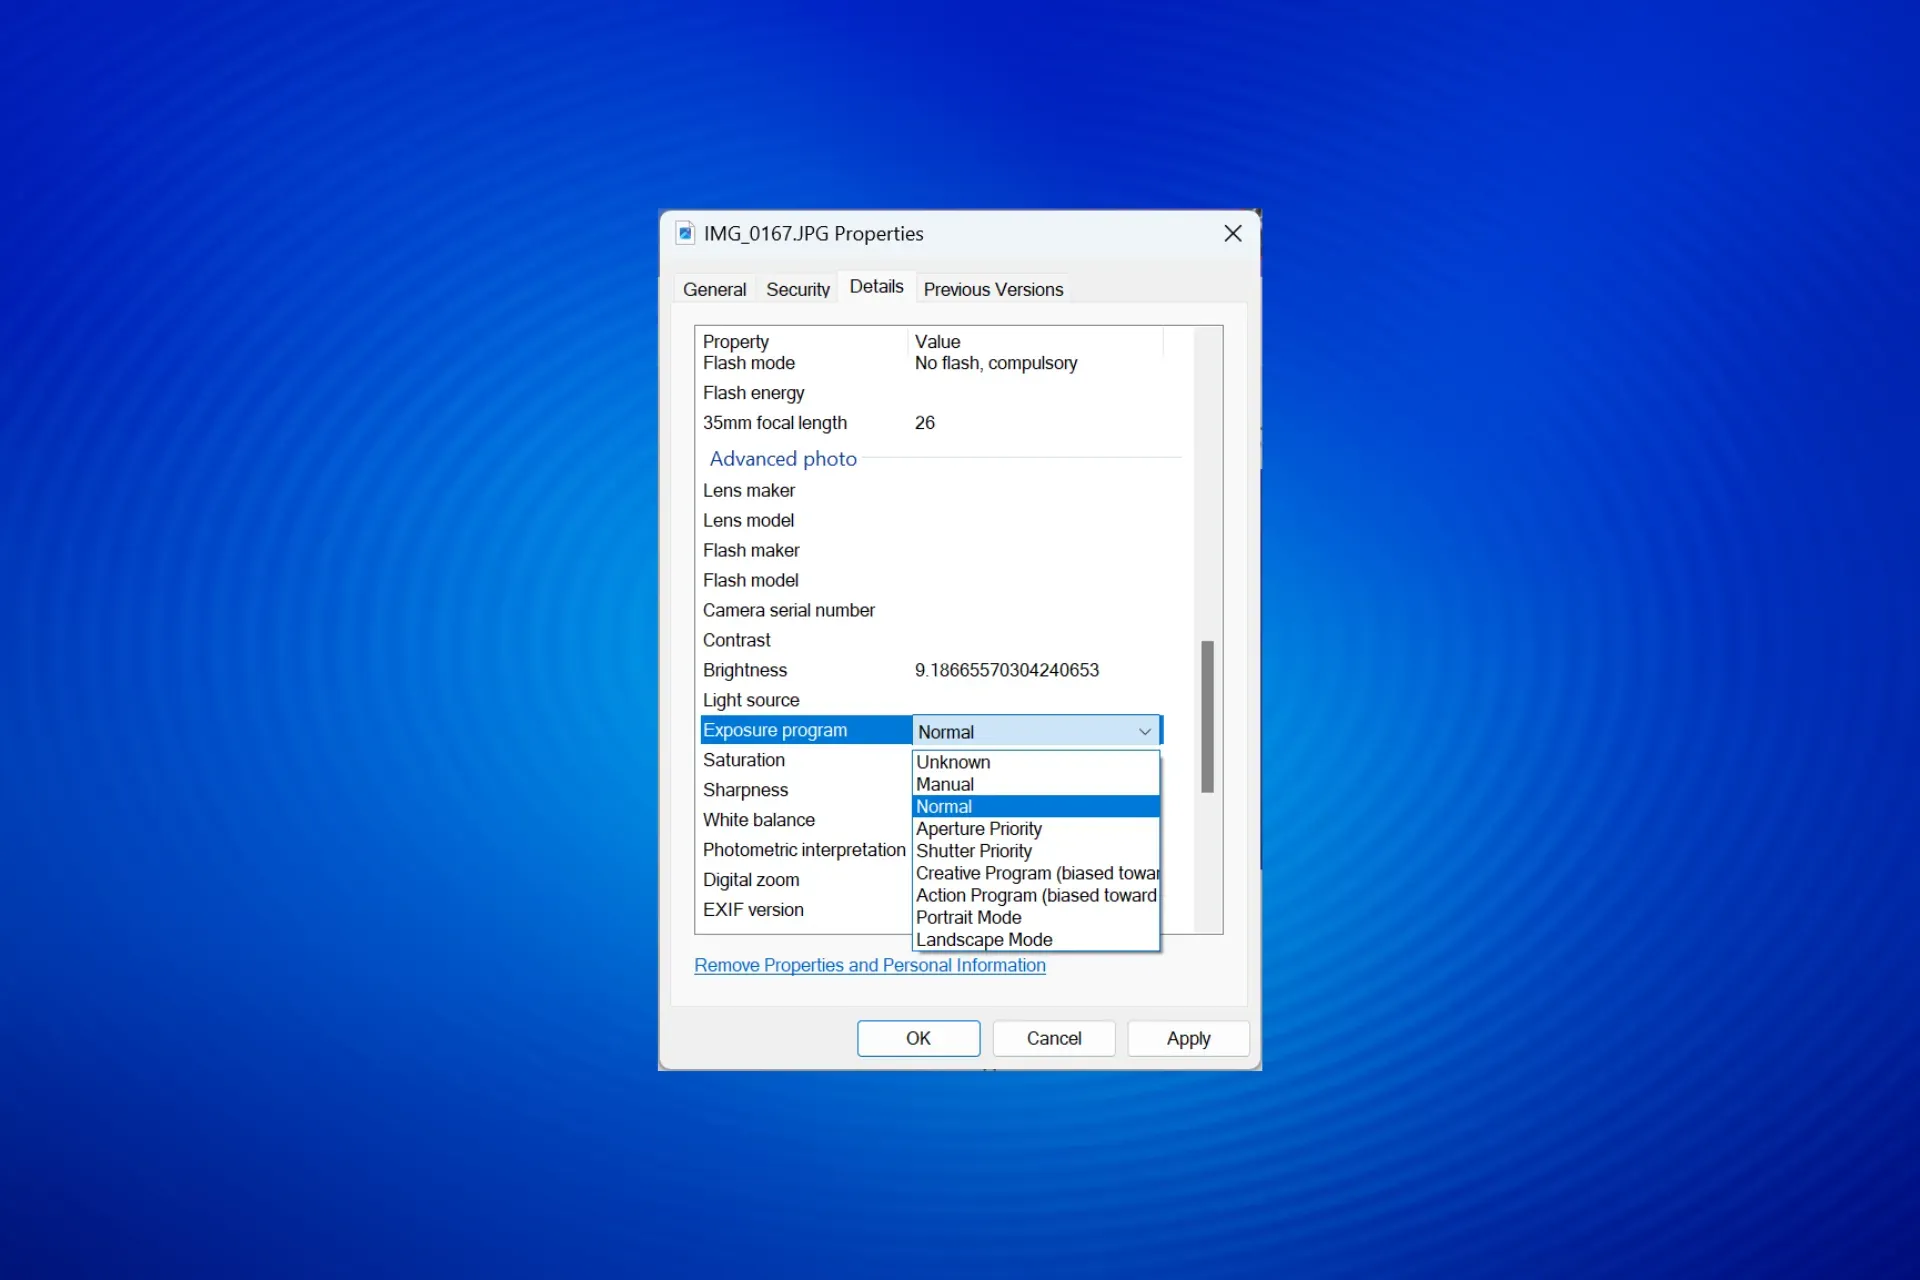
One of the simplest methods for removing EXIF data on Windows 11 is through File Explorer. This built-in tool allows you to easily access and modify image properties without requiring additional software. To do this, navigate to the image you want to edit, right-click it, and select ‘Properties.’ In the Properties window, go to the ‘Details’ tab. There, you will find an option labeled ‘Remove Properties and Personal Information.’ By following these steps, you can effectively strip away sensitive metadata from your images.
When you choose to remove properties, you have the option to either create a copy of the image with all metadata removed or selectively delete specific properties. This flexibility is beneficial for users who wish to keep certain details while safeguarding their privacy. After you complete this process, it’s a good practice to verify that the EXIF data has been removed by checking the ‘Details’ tab again. This ensures that your privacy is protected and that you can confidently share your photos without the risk of disclosing personal information.
Clearing Photo Metadata with the Photos App
The Photos app on Windows 11 is another effective method to clear photo metadata. By leveraging this built-in application, users can not only view their images but also edit them while stripping away unwanted EXIF data. To begin, open the Photos app, select the image you wish to modify, and utilize the editing tools to make a minor adjustment, such as cropping or changing brightness. After making these changes, save your photo as a new file. This process typically results in a copy of the image that lacks much of the original metadata.
It’s important to note that while the Photos app is user-friendly, it may not remove all types of metadata. Thus, users concerned about their privacy should combine this method with other techniques, such as using File Explorer or third-party tools. By understanding how to utilize the Photos app effectively, you can ensure that your images are not only visually appealing but also devoid of sensitive information.

Batch Remove EXIF Data From Images Using PowerShell
For users needing to manage large volumes of images, batch removing EXIF data using PowerShell can be a game-changer. This method is particularly beneficial for photographers and content creators who frequently handle multiple files. By using PowerShell in conjunction with ExifTool, you can automate the process of stripping metadata from numerous images simultaneously. First, download ExifTool and prepare it for use in PowerShell. Then, by executing a simple script, you can clear the EXIF data from all specified image files in one go.
This batch processing is not only efficient but also ensures that you maintain a level of privacy across all your images. As you execute the PowerShell script, you will see the progress on the screen, giving you real-time feedback on the operation. Once complete, you can check your images to confirm that the EXIF data has been removed, providing peace of mind that your privacy is protected when sharing photos.
Using IrfanView for EXIF Removal
IrfanView is a well-known free third-party tool that offers extensive features for managing images, including the ability to remove EXIF data. With its straightforward interface, users can easily navigate through various options to optimize their photos. After installing IrfanView, simply open your desired image and select the ‘Save As’ option. In the Save Options window, ensure that the ‘Keep Original EXIF Data’ option is unchecked to effectively strip away all metadata.
By utilizing IrfanView, you can batch process multiple images as well, making it a versatile choice for photographers seeking to maintain their privacy. The ability to reset the EXIF orientation tag further enhances the privacy aspect, ensuring that your images are not just visually appealing but also free from potentially sensitive information. This method is particularly useful for those who regularly share images online and want to ensure their privacy is protected.
Web-Based Solutions for Removing EXIF Data
If you prefer not to download software for managing your images, web-based tools offer a convenient alternative for removing EXIF data. Websites such as Jimpl allow users to upload their photos and easily strip away metadata without the need for installation. This method is straightforward: simply drag your image onto the site and click ‘Remove Metadata.’ While this solution is quick and easy, it is important to exercise caution, especially with sensitive images, as uploading photos to online services can pose privacy risks.
While web-based solutions provide convenience, users should be aware of the potential risks involved in using such services. Always consider whether the images you are uploading contain sensitive information that could be compromised. For casual images, this method may suffice, but for more sensitive content, using local software tools like IrfanView or PowerShell may offer a safer alternative. Ultimately, understanding the balance between convenience and privacy is key when choosing how to manage EXIF data in your images.
Preventing Location Data in Future Photos
To ensure that location data is not included in future images, it is wise to adjust the camera settings on your smartphone. For Android devices, you can typically find the option to disable location tagging in the camera settings menu. This adjustment varies by device, but it generally involves navigating to the camera app settings and turning off ‘Store Location Data.’ By doing this, you can prevent your device from embedding GPS coordinates in your photos altogether.
For iPhone users, the process is similar. By going to Settings > Privacy & Security > Location Services > Camera, you can select ‘Never’ to prevent the Camera app from accessing your location data. Implementing these settings not only helps maintain your privacy but also ensures that any photos you take in the future do not inadvertently reveal your location to others. Proactively managing your camera settings is an essential step toward safeguarding your personal information.


The Importance of Regular Privacy Checks on Photos
Regularly checking your photos for EXIF data is an essential practice for maintaining privacy in the digital age. As technology evolves and sharing images becomes increasingly common, understanding the implications of metadata is crucial. By routinely auditing the images you share, you can ensure that sensitive information is not inadvertently disclosed. This practice is particularly important for individuals who frequently share images on social media or with clients.

Moreover, being proactive about your privacy can prevent potential misuse of your personal data. Regular checks can involve using the methods outlined earlier, such as File Explorer, the Photos app, or third-party tools. By making this a habit, you can cultivate a safer online presence and enjoy the benefits of photography without compromising your privacy. Remember, the steps you take today can significantly impact your future digital footprint.
Conclusion: Mastering EXIF Data Management for Enhanced Privacy
In conclusion, effectively managing EXIF data is a vital aspect of maintaining your privacy in today’s digital landscape. By utilizing the various methods outlined in this guide, such as File Explorer, the Photos app, PowerShell, and third-party tools like IrfanView, you can ensure that your images remain free from sensitive metadata. Each method offers unique advantages, catering to different user preferences and needs.
As you navigate the world of photography, remember that your privacy is paramount. Regularly review and remove EXIF data from your images before sharing them, and take preventative measures to stop location data from being embedded in future photos. By doing so, you not only protect yourself but also foster a culture of privacy awareness in your digital interactions. With the right tools and knowledge, you can confidently share your memories while keeping your personal information secure.
Frequently Asked Questions
How do I remove EXIF data on Windows 11 using File Explorer?
To remove EXIF data on Windows 11 using File Explorer, right-click on the photo, select ‘Properties’, then go to the ‘Details’ tab. Click ‘Remove Properties and Personal Information’, choose ‘Create a Copy With All Possible Properties Removed’ to remove all metadata, or select specific properties to delete.
Can I batch remove EXIF data from images on Windows 11?
Yes, you can batch remove EXIF data from images on Windows 11 using PowerShell and ExifTool. Download ExifTool, then use a PowerShell script to remove EXIF data from multiple images simultaneously by executing the appropriate commands in PowerShell.
What is the easiest way to clear photo metadata on Windows 11?
The easiest way to clear photo metadata on Windows 11 is by using the built-in Photos app. Open the photo in the Photos app, make a minor edit, and then save it as a copy, which will remove much of the metadata, including EXIF data.
How can I use IrfanView to remove EXIF data on Windows 11?
To remove EXIF data on Windows 11 using IrfanView, open the photo in the application, go to ‘File’ > ‘Save As’, deselect ‘Keep Original EXIF Data’, and click ‘Save’. This will create a new version of the photo without the EXIF data.
Are there online tools to remove EXIF data from images on Windows 11?
Yes, there are online tools like Jimpl that allow you to remove EXIF data from images. Simply upload your photo to the website, click ‘Remove Metadata’, and download the cleaned image. However, be cautious with sensitive images when using online services.

How does removing photo metadata enhance Windows 11 privacy?
Removing photo metadata, including EXIF data, enhances Windows 11 privacy by preventing others from accessing personal information such as camera details and location data embedded in your images.
What should I do to prevent my phone from adding location data to photos?
To prevent your phone from adding location data to photos, adjust the camera settings on your device. For Android, access the Camera app settings and disable ‘Store Location Data’. For iPhone, go to Settings > Privacy & Security > Location Services > Camera and select ‘Never’.
| Method | Steps | Notes |
|---|---|---|
| File Explorer | 1. Right-click the photo > Properties > Details. 2. Click ‘Remove Properties and Personal Information.’ 3. Choose to remove all or specific properties. 4. Click ‘OK.’ | Verifies removal by checking the Details tab again. |
| Photos App | 1. Open photo in Photos app. 2. Edit photo slightly. 3. Save as Copy to remove metadata. | Requires minor edits to save a copy without EXIF data. |
| PowerShell | 1. Download and set up ExifTool. 2. Run PowerShell command to clear EXIF data from multiple images. | Best for batch processing multiple images. |
| Third-Party Tool (IrfanView) | 1. Open image in IrfanView. 2. Save As with EXIF options adjusted. | User-friendly interface for individual images. |
| Web-Based Tool (Jimpl) | 1. Upload photo to Jimpl. 2. Click ‘Remove Metadata.’ | Not recommended for sensitive images. |
Summary
To remove EXIF data on Windows 11, you can use various methods including File Explorer, the Photos app, PowerShell, and third-party tools. This process is essential to enhance your privacy by eliminating sensitive information such as camera details and location data embedded in your photos. By following the steps detailed above, you can effectively strip your images of unwanted metadata and safeguard your personal information.